Playlists
Playlists allow you to group communications together for review, sharing, or quality assurance (QA), while keeping the files securely within the platform. They also provide a secure way to share private calls with other authorised users.
New Playlist
To add communications to a new playlist, first locate the communication(s) you want to include. You can add communications to a playlist in one of two ways.
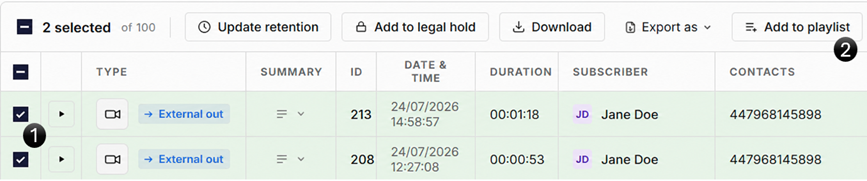
Select the checkbox to the left of the communication (1), then click Add to Playlist (2).
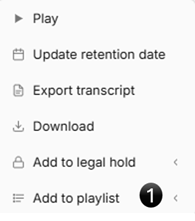
Alternatively click the three dots on the far right of the communication, then select Add to Playlist (1) from the dropdown menu.
To add multiple communications, select the checkbox next to each communication you want to include (as shown above). Once all required communications have been selected, follow the method above to add them to the playlist.
If the playlist does not already exist, click New Playlist. The New Playlist window is displayed.
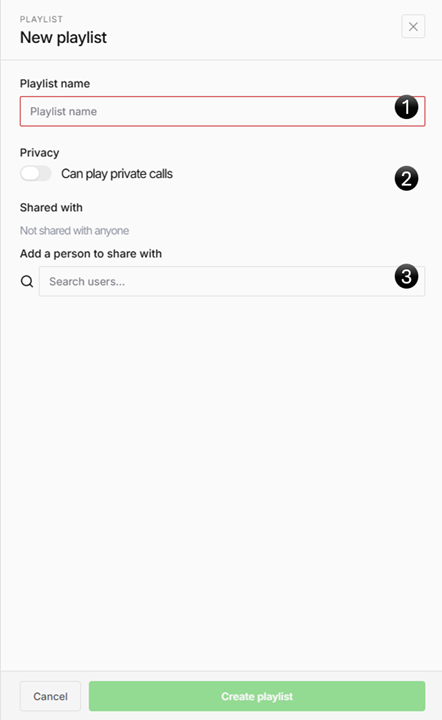
- Playlist Name - Enter a meaningful name that reflects the communications contained within the playlist
- Privacy - Determines whether private calls can be played through this playlist
- Shared With - Select the users you want to share the playlist with
Edit Playlist
To edit an existing playlist, select Playlist from the main Communications screen (1). A dropdown menu displays your existing playlists.
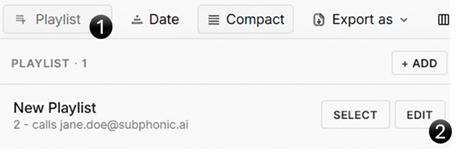
Select the playlist you want to edit, then click Edit (2) to open the Edit Playlist window.
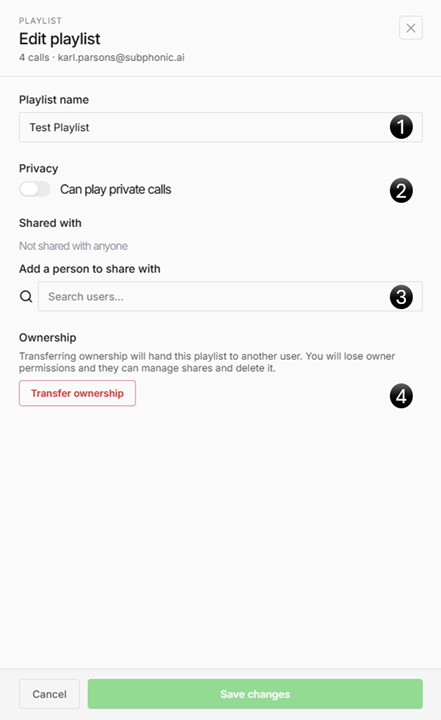
- Playlist Name - Enter a meaningful name that reflects the communications contained within the playlist
- Privacy - Determines whether private calls can be played through this playlist
- Shared With - Select the users you want to share the playlist with
- Ownership - Transfer ownership of the playlist to another user. The new owner can manage sharing permissions and delete the playlist
Selected Playlist
Once you have a Playlist selected and it returns in the search results, the fact the Playlist has been selected is indicated by the green Selected icon.
